Order your first server, step by step
Every part of the Rack4 order form, from the operating system to the order button, what each choice does, and what happens after you pay.
To order a server, open Create server on your servers page (or go to my.rack4.io/servers/new), choose the server, say how you'll log in, and press Order. The invoice opens next; once it's paid, the server is built and its page shows every step as it happens.
What you need
- A Rack4 account with a confirmed email address. The order form asks you to confirm it first.
- An SSH key in your account, or the decision to use a root password instead. Keys are the safer way in.
- A way to pay: Bitcoin, USDT (TRC-20) or account credit. Payment methods has the details.
How the form works
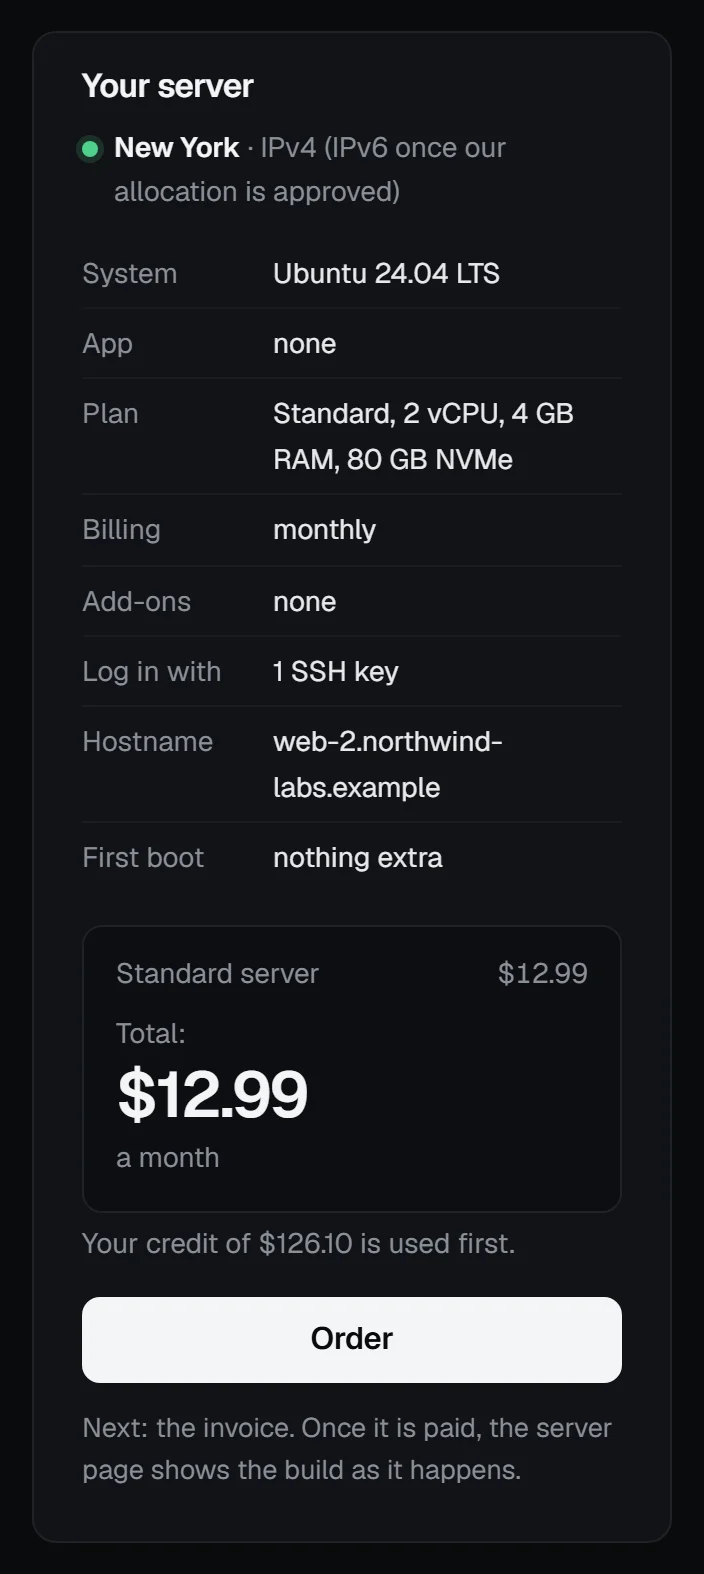
The form is one page in three sections: Choose your server, Access, and Optional. Everything in the first section starts with a sensible pick, so most orders only need a hostname and an SSH key. Your server, beside the form, sums up every choice with the total and the Order button, and each line in it takes you to its part of the form. On a phone, the total and Order stay at the bottom of the screen.
Every server runs in New York for now. The summary says so; there's nothing to pick.
1. Choose your server
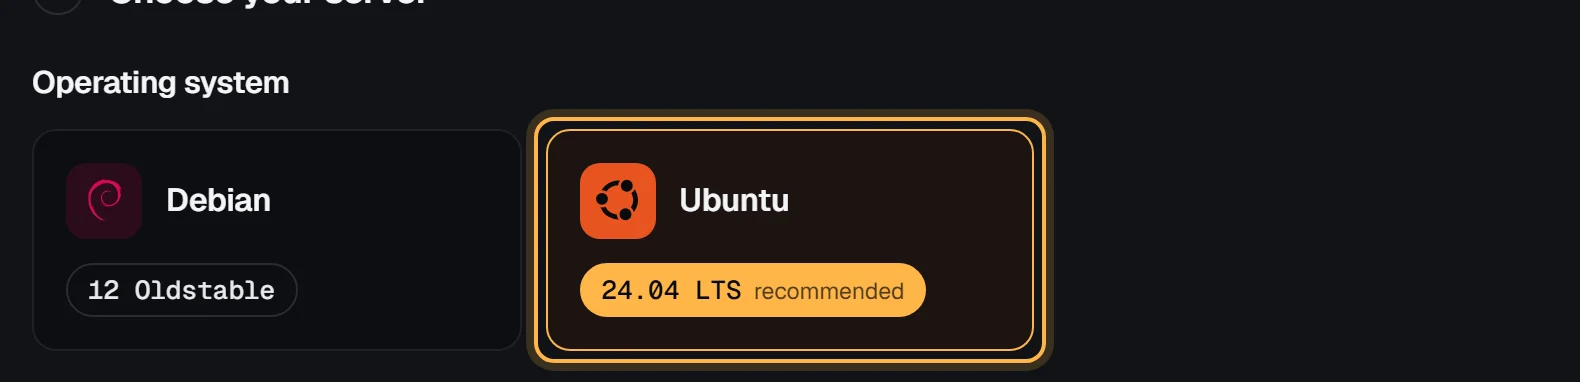
Operating system
Each distribution is a card, and each version a button on it. The recommended version is marked. Without a strong preference, take Ubuntu LTS or Debian; Choose a Linux distribution has the longer answer.
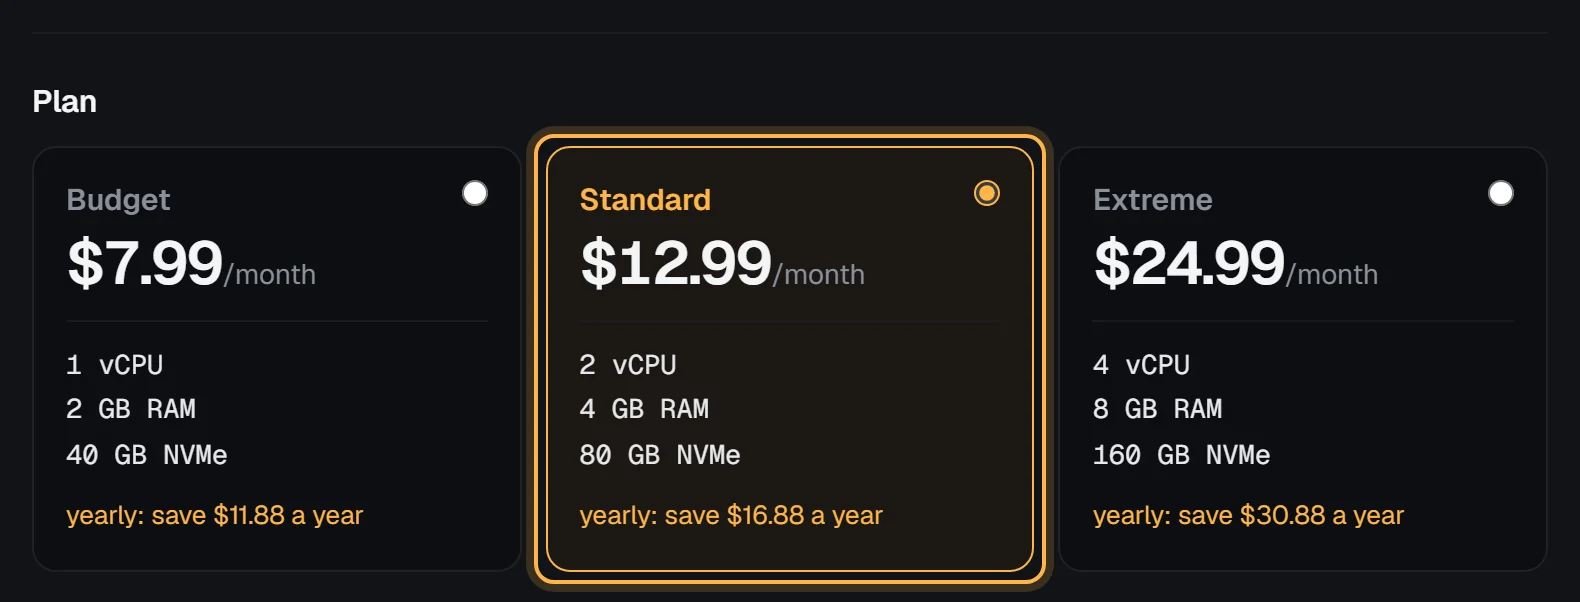
Plan
Pick Budget, Standard or Extreme. Each card shows the vCPUs, memory and NVMe disk, the monthly price, and what paying yearly saves. Choose a plan and How much RAM does my VPS need help if you're torn.
Billing
Monthly is billed each month and you can cancel any time. Yearly bills twelve months at once, for less. Either way there's no setup fee, and the money-back guarantee covers your first order for 14 days after you pay. You can switch between them later, from the next renewal, on the server's Settings tab.
One-click app (optional)
Pick an app to have it installed on the first boot, or leave it on None for a plain server. The first few apps show; search by name, pick a category, or choose Show all apps for the rest. Apps that don't run on the system you picked are hidden, and an app that needs a bigger plan says so.
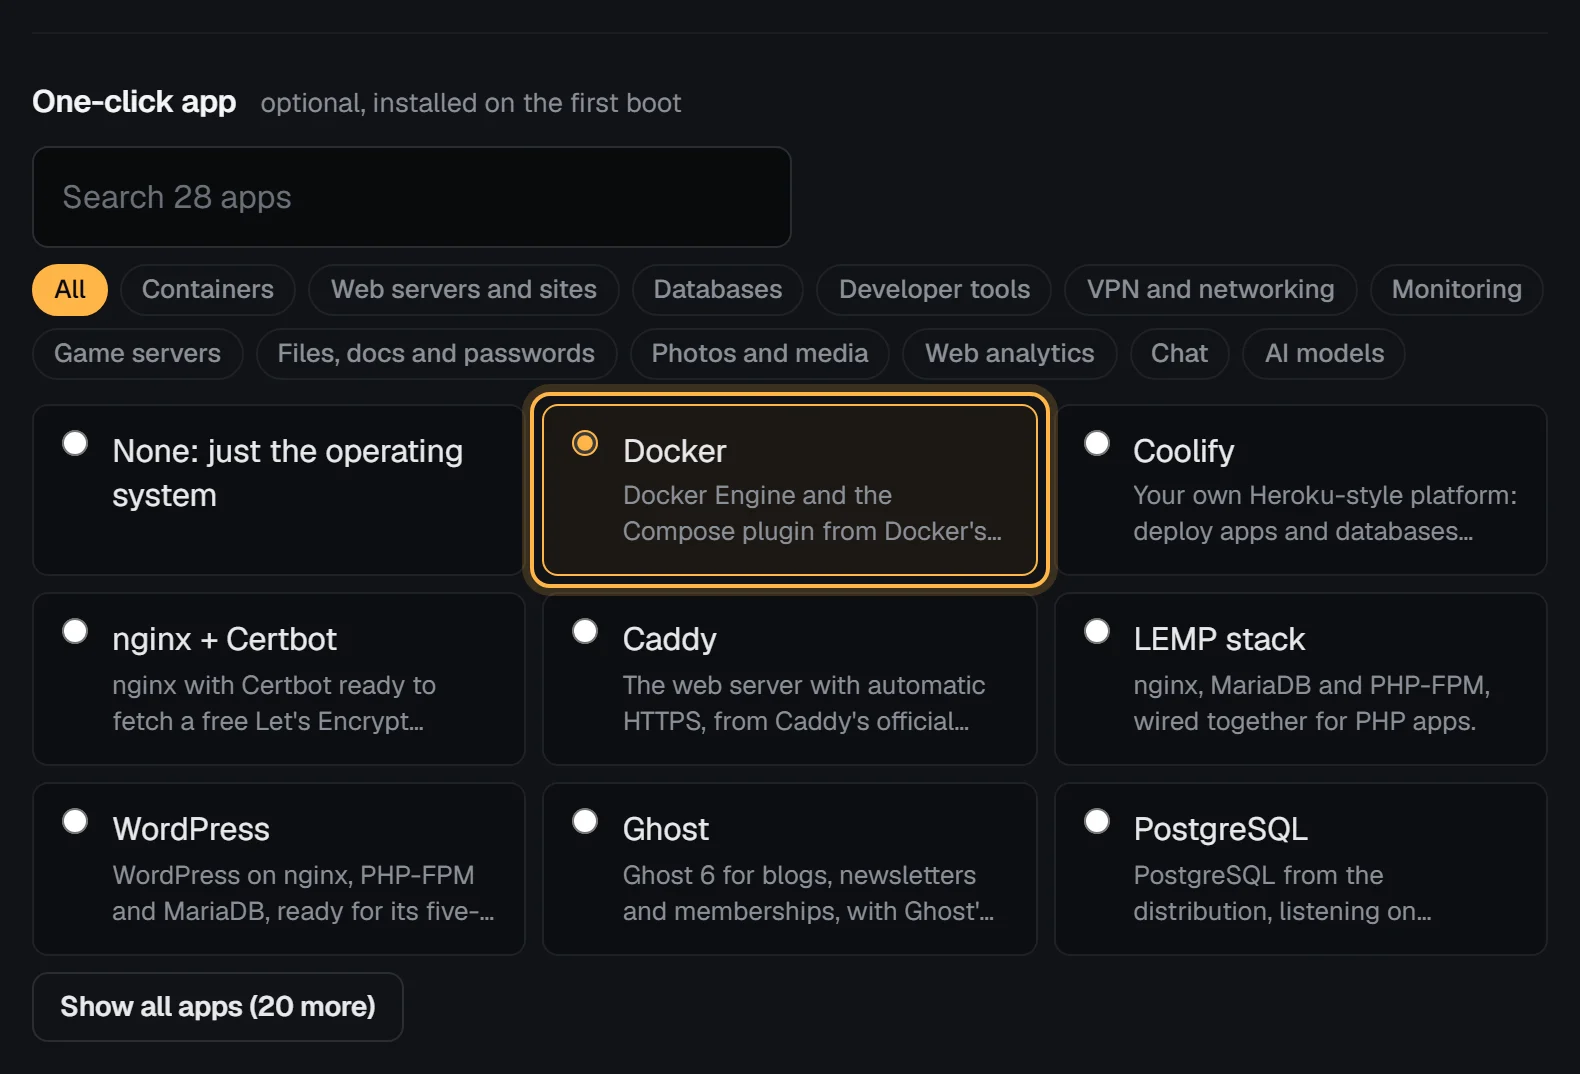
One-click apps lists them all, with how to follow the install once the server is up.
2. Access
Hostname
Type the server's name, like web-1 or web-1.example.com. It's set inside the server on the first boot and names it in the panel. Use 1 to 63 lowercase letters, digits, dashes and dots; each part starts and ends with a letter or digit. You can give it a friendlier panel name and tags afterwards.
How you log in
Tick each SSH key you want on the server. None is ticked for you. A root password is optional, under Root password: No password: SSH keys only (recommended), Generate one for me, or Use my own.
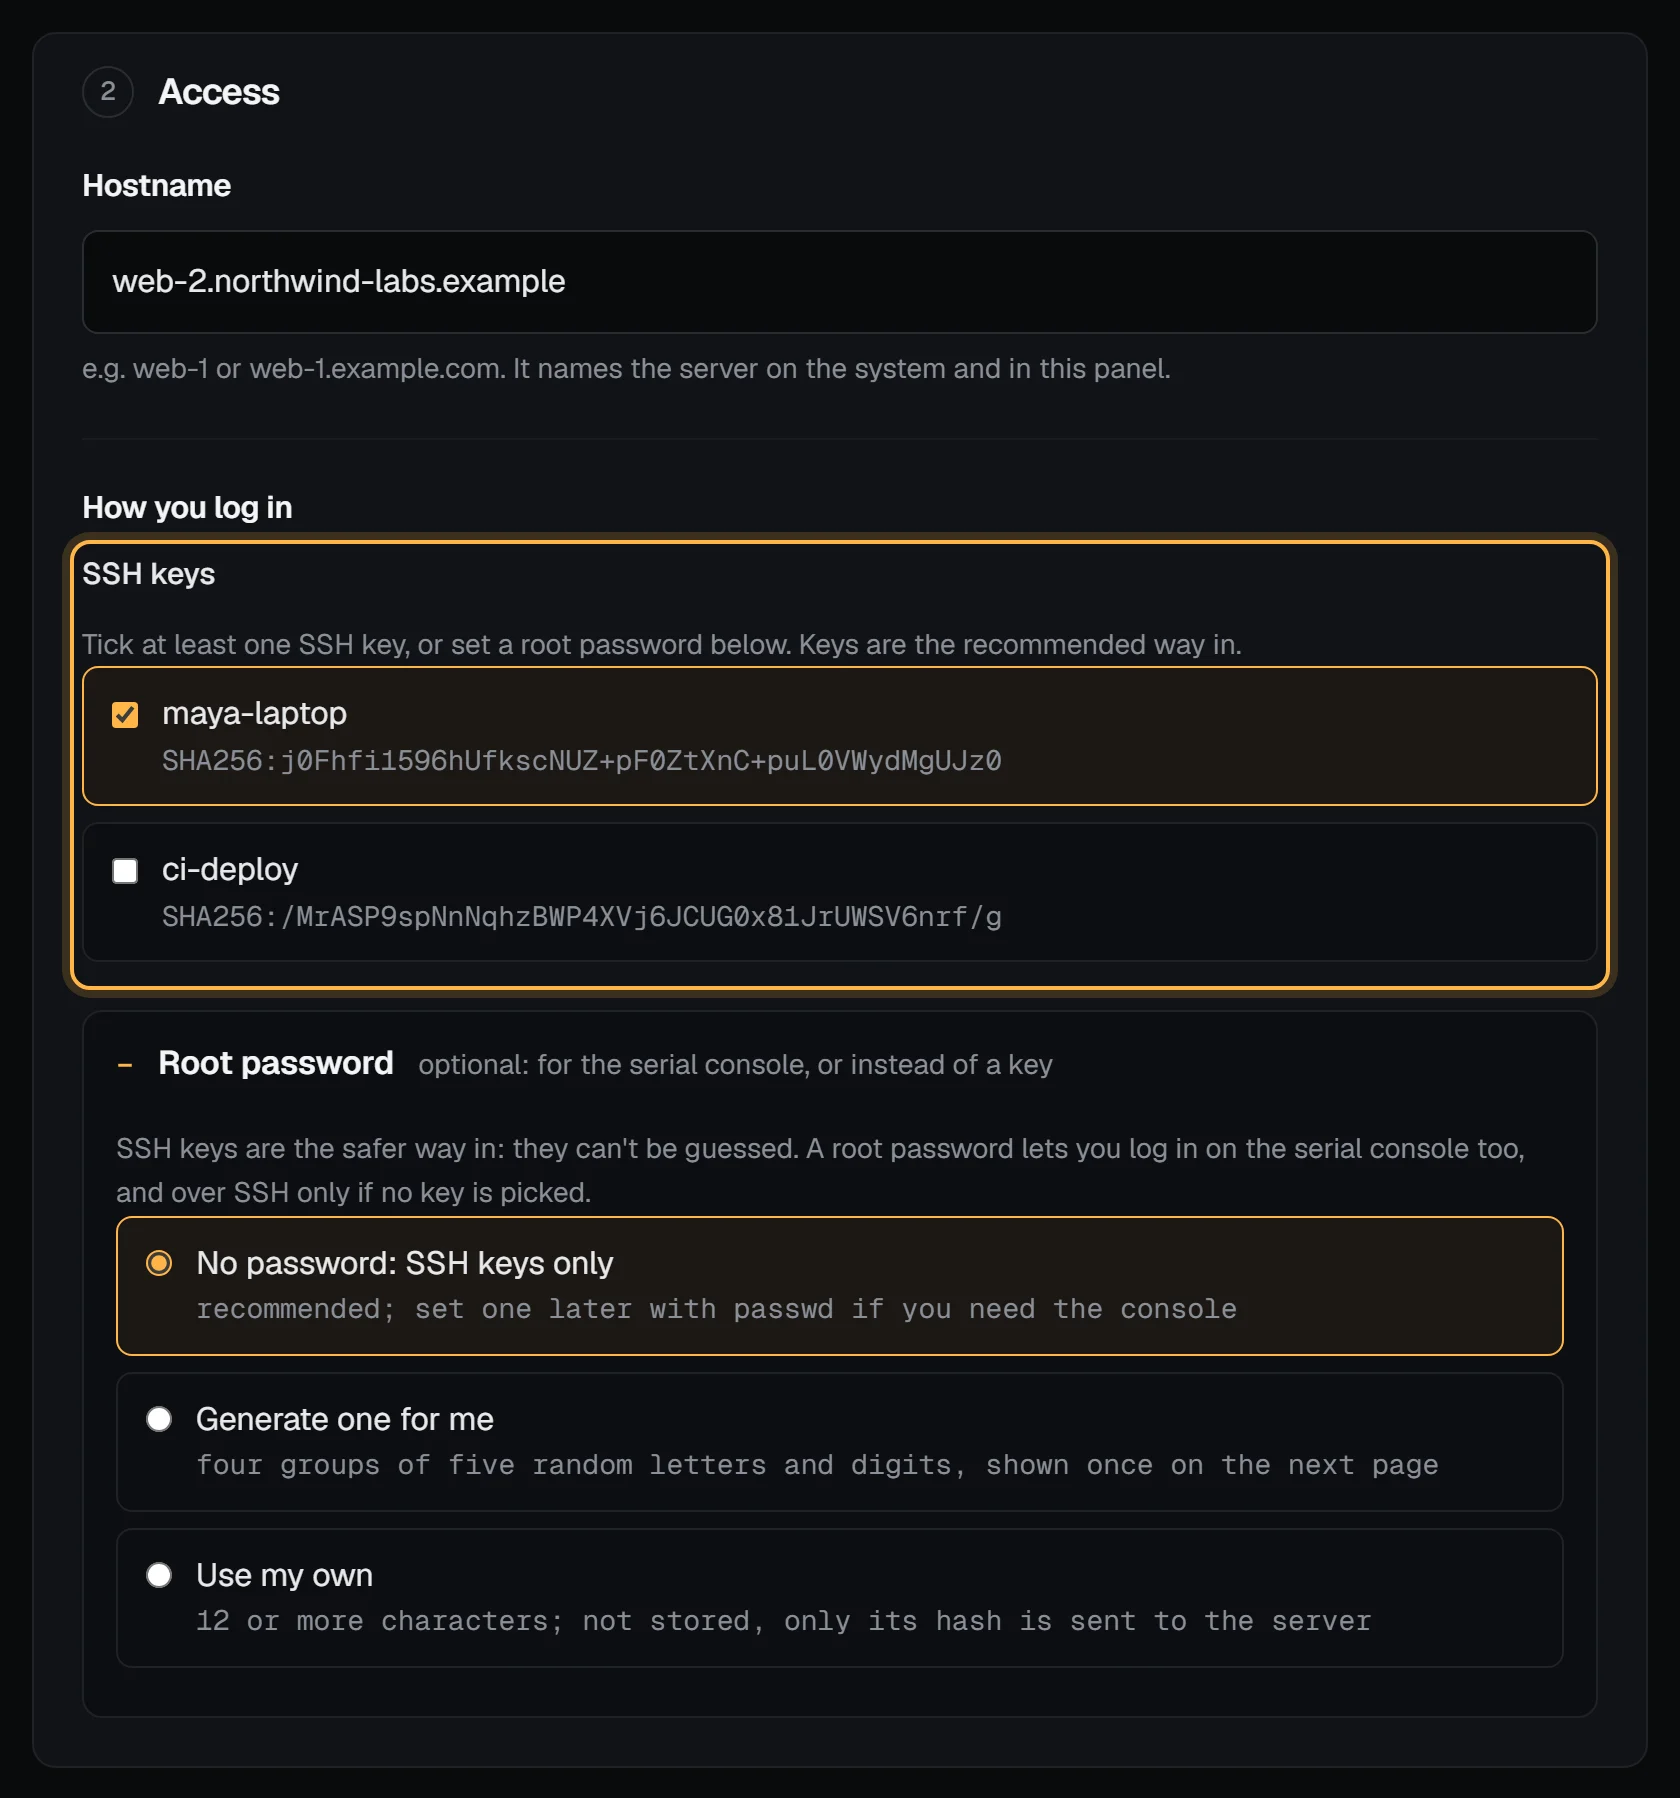
A server needs at least one key or a root password. A generated password is shown once, on the page after you order, so have your password manager ready. Set a root password explains the three choices.
3. Optional
Each of these is folded away; open it only if you need it.
- Add-ons, when they're on sale: RAM, vCPUs, NVMe disk, transfer or IPv4 addresses on top of the plan, each up to the plan's limit. The total updates as you change them, and you can change them later too: see Add-ons.
- First boot: extra packages to install and a setup script to run once, after the system and the app. Extra packages and setup scripts has examples, and recipes like Secure server setup paste in here.
- Promo code: type it and choose apply. Use a promo code has the details.
Order
Your server repeats every choice next to the total. If you have account credit, it says it's used first. Press Order: if something is missing, like a key or a hostname, the form says so at that part and lists it by the button, with a link to it.
After you press order
- The invoice opens. If your credit covered the total, it's already paid. If you chose Generate one for me, the root password page comes first: save the password, then go on to the invoice.
- Pay it with Bitcoin or USDT (TRC-20) from the invoice. An order invoice not paid within 7 days is cancelled. You can hold up to 3 unpaid orders at once.
- The build starts as soon as the payment confirms. Open the server from your servers page to watch it build: the page shows each step and the time since your order, and ends with the
sshcommand to copy. - We email you when the server is ready.
What happens when you order a server covers the billing that follows, from the first renewal on.
Check it worked
Your servers page lists the new server. While it's being built it shows provisioning; when it's done it shows running with its IPv4 address. Then log in:
ssh root@203.0.113.42Use the address from the panel; 203.0.113.42 is a placeholder.
Order from a link
Links on rack4.io/plans, the app pages and the distribution pages open the form with the plan, system, app or add-ons already picked. You can still change anything before you order.
You can build such a link yourself:
https://my.rack4.io/servers/new?plan=standard&term=yearly&os=ubuntu-24.04&app=docker&addon_disk=40plan is budget, standard or extreme; term is monthly or yearly; os is a distribution key from /os; app is an app id from /apps; and addon_ram, addon_vcpu, addon_disk, addon_transfer and addon_ipv4 take a number in the add-on's own unit (GB of RAM or disk, cores, TB or addresses). Anything the form doesn't recognise is ignored. If you aren't logged in, the link survives the login.
Troubleshooting
- "Confirm your email to order." Open the link in the email we sent when you signed up, or use send a new link in the banner at the top of the page. Verify your email has the details.
- "Tick an SSH key, or choose a root password." Tick at least one SSH key, or open Root password and pick one. If you have no keys, add one in another tab, then reload the form.
- "Use 1 to 63 characters: lowercase letters, digits, dashes and dots." The hostname has a character it can't use, like an underscore or a space, or a part that starts or ends with a dash.
- "Too many tries in a short time. Wait a while and try again." Wait a few minutes, then press Order again.
- "You have 3 unpaid orders." Pay one of their invoices, or wait for one to lapse after 7 days, before ordering more.
Next steps
- Watch your server build
- Connect to your server with SSH
- Your server's first hour: a checklist
- Panel tour
Doing it on Rack4
The plans and prices are on rack4.io/plans. Each one-click app and distribution has a page with an order link that fills in the form for you.